Installing the ILS Target
Disassembly of the tool and/or installations of accessories must only be performed by qualified maintenance personnel.
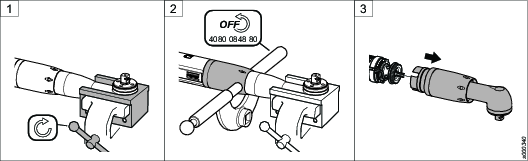
Required tools:
Adjustable spanner
T10 screwdriver
Put the front part in a clamping jaw of suitable size and fasten the clamping jaw in a vise.
Loosen the front cap nut using an adjustable spanner. Remove the tool from the vise.
Pull out the angle gear carefully from the tool.
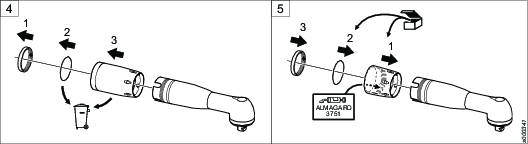
Remove the following parts from the angle gear housing:
the lock ring (keep for later use)
the sealing washer (to be discarded)
the front cap nut (to be discarded)
Mount the following parts on the angle gear housing:
new applicable front cap nut. Apply a thin layer of grease on the inside of the cap nut.
new sealing washer
lock ring
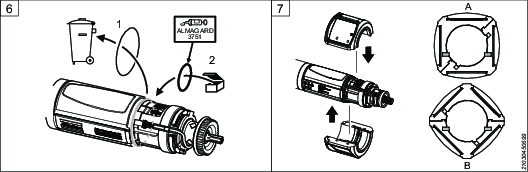
Replace the O-ring on the motor housing with a thicker O-ring of the same diameter. Apply a thin layer of grease on the O-ring and on the lower section of the motor housing.
Mount the ILS Target on the tool. Start by fitting the lower half into the correct position. When the lower half is placed in the correct position, the two pins will fit into the slots of the motor housing and prevent the ILS Target from rotating. Put the upper half together with the lower half.

The two pins on the inside of the target can be moved between the slots, allowing for two different positions of the ILS Target on the tool: flat(A) or 45°(B).
Tighten the four T10 screws .
Make sure the sealing on the end of the half-rings seals tightly
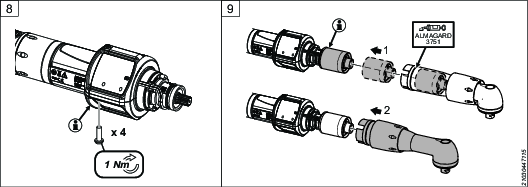
Pull out the planetary gear (1) from the gear housing. Push down the planetary gear fully on the shaft.
Make sure the gear wheel is placed in correct position.
Put the gear back in position. Apply a thin layer of grease on the sealing washer.
Put the front part in the clamping jaw and fasten the clamping jaw in the vise.
Tighten the front cap nut using adjustable spanners.