Installing the balancer
Before you start the installation, measure the applicable position of the torque arm for your working area.

Depending on the size and weight of the parts to be installed, a second person will be required to help to carry out installation step No.4.
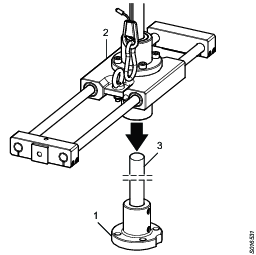
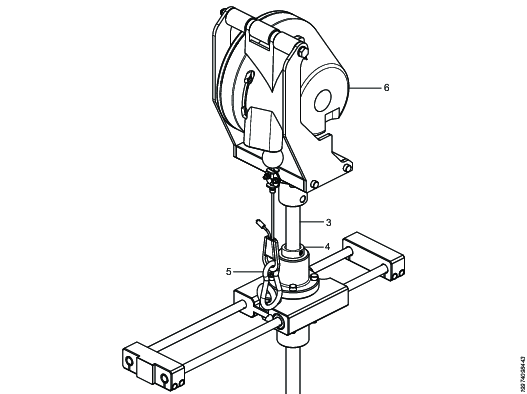
After the foot part (1) has been fastened, the horizontal unit (2) is pushed onto the upright shaft (3).
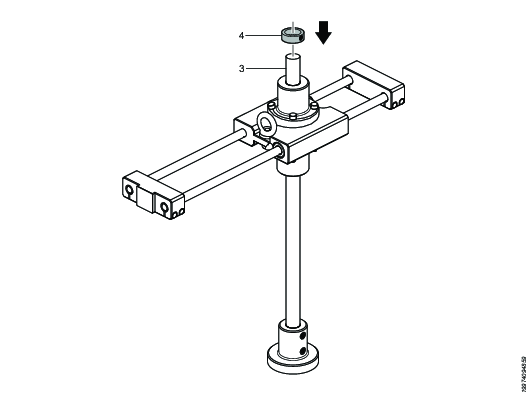
Place the collar(4) onto the shaft (3) and let it rest on the horizontal unit (2) while performing the next steps.
Now install the balancer (5). To do this, the spring hook (4) is hooked into the link of the horizontal unit (2).
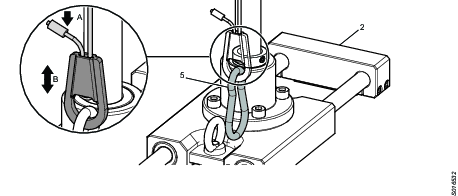
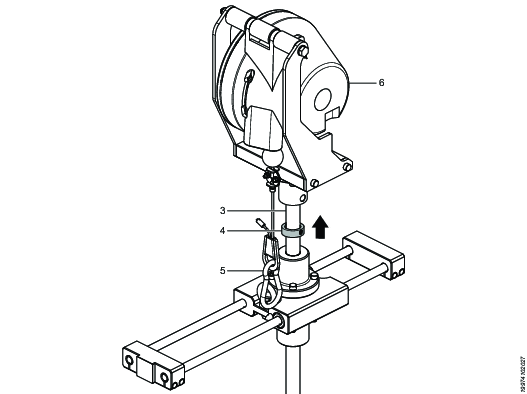
Lift the horizontal unit (2) until the balancer (5) can be inserted into the upright shaft (3).
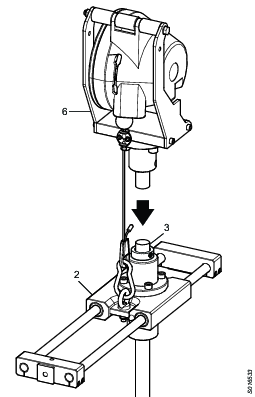
Slide the collar along the shaft (3) until it's 1-2 mm beneath the balancer(6) unit.
Tighten the screw until the slight resistance is felt and twist the collar into its final position. Make sure the collar is correctly seated below the balancer.
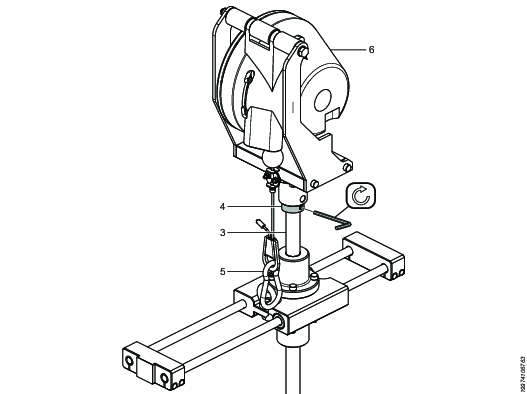
Fully tighten the screw to the recommended torque (m6 = 10 Nm, m8 = 20 Nm, m10 = 20 Nm). Use appropriate torque wrench. When tight a gap should remain in the clamp portion of the collar. Take care, not to over tighten. over tightening could damage the collar which would lead to a decrease in the performance or failure.


