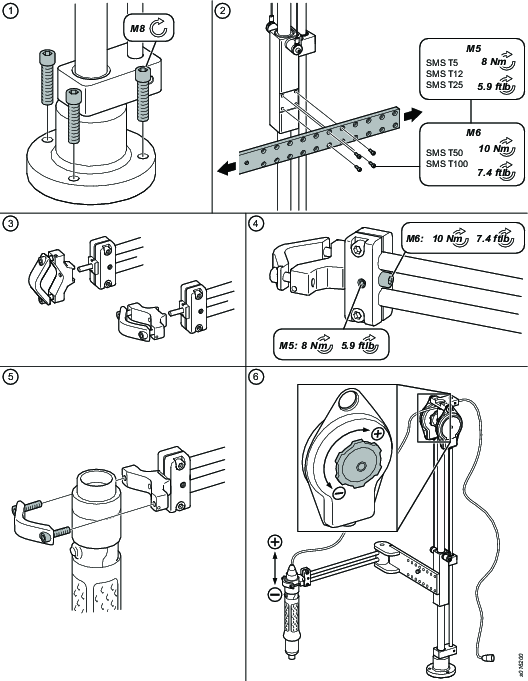
Installing the torque arm attachment
Before you start the installation, measure the applicable position of the torque arm for your working area.
Fasten the torque arm base with screws (not supplied) on a horizontal bench. Tighten the screws until the torque arm is properly seated.
Fasten the horizontal arm on the vertical arm with the screws. Select the applicable holes on the arm for optimal operation within your working area.
Choose the tool holder orientation.
Fasten the tool holder at the end of the horizontal arm with the screws. Tighten the screws with the recommended torque.
Attach the tool to the tool holder on the recommended tool clamp area with the screws. Tighten the screws to the recommended torque. For more information about correct tool clamp area and recommended torque, see the applicable tool Product Instruction or contact your local Atlas Copco representative.
Set the balancer. Turn the wheel on the balancer to get the optimum resistance (depending on the tool). The tool can at this time be connected to the power supply.