Tools
Tools section describes how to setup the parameters (Tools and Inspections) necessary to do a test.
The device can store up to 10000 tools into its own memory.
In the Home page, select Tools. The following is displayed:
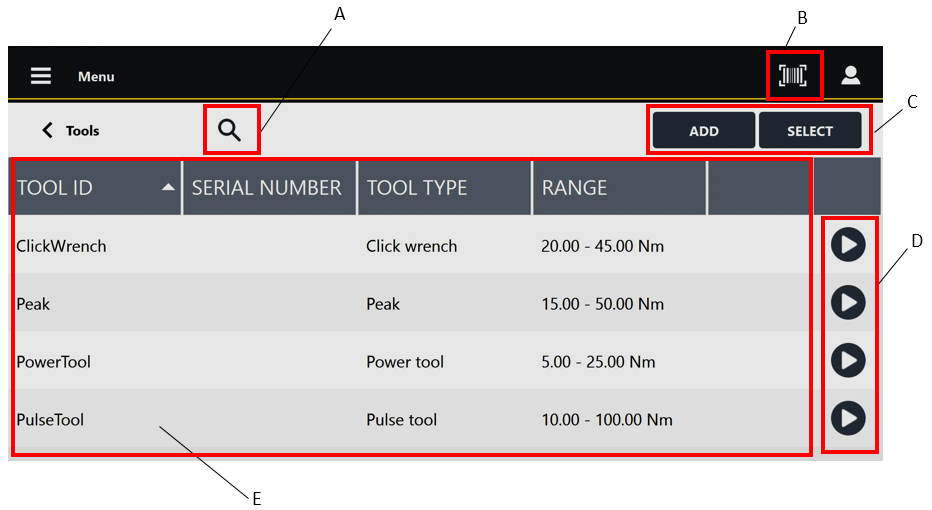
A | Search button | B | Barcode button |
C | Command buttons | D | Play buttons |
E | List of Tools |
Below are the columns that define the list of Tools:
Tool ID: ID assigned when the Tool is created.
Serial Number: serial number assigned when the Tool is created.
Tool Type: type assigned when the Tool is created.
Range: torque operating range assigned when the Tool is created.
To sort the columns that define the list of Tools: tap the column to be sorted, the up arrow (placed on the right of the column heading) lists the Tool ID (or Serial Number / Tool type / Range) details in ascending alphabetical order; the down arrow lists the Tool ID (or Serial Number / Tool type / Range) details in descending alphabetical order.
To customize the sequence of the columns that defines the list of Tools: tap the column heading to be moved (Tool ID / Serial Number / Tool Type / Range), then drag and drop it to the necessary position.
When enabled by external software, the Barcode button ( ) allows to scan a barcode to search the corresponding Tool inspection(s) on the measuring device. If the search finds a single Tool inspection, it is automatically run; if the search finds multiple Tool inspections with the same barcode identifier, run the inspection of interest from the list.
The Play button gets active only after adding/updating the inspection(s) linked to the Tool. If enabled, tap Play to run the test.


