Disassembling the screw housing
Required tools
Allen keys or bits 4-10 mm
Screw bits and sockets
Torx® keys or bits T6-T25
Torque wrench
Lifting device
Screwdrivers
Pliers
Bearing puller (optional)
Feeler gauge
Lubricant | Description |
|---|---|
Klüberlub® BE 71-501 | http://www.klueber.com/en/product-detail/id/404/ |
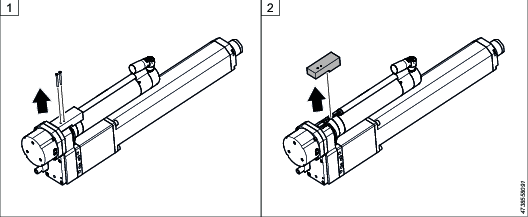
Remove the connector cover screws.
Disassemble the connector cover.
Disconnect the load cell cable from the motor cable.
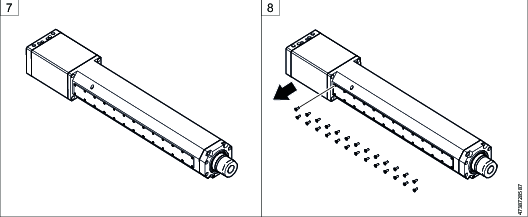
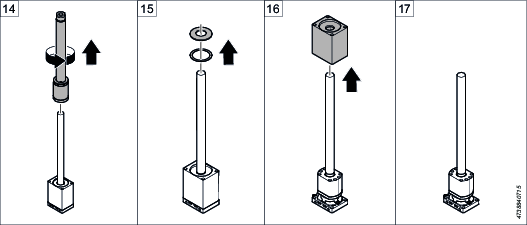
Fix the press by clamping over the gearbox housing using a soft vice.
Unscrew the bolts (4x) holding the screw housing assembly to the gearbox.

Discard used bolts.
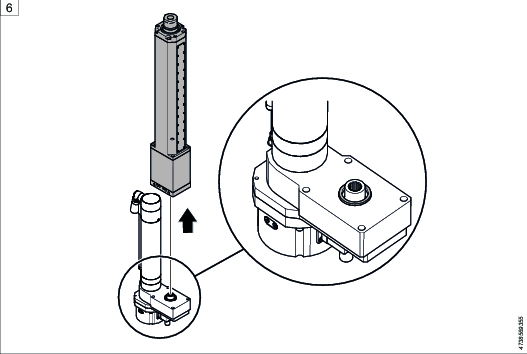
Slide the screw housing assembly out of the spline joint in the gearbox.
The guide ring can be placed seated in the gearbox.
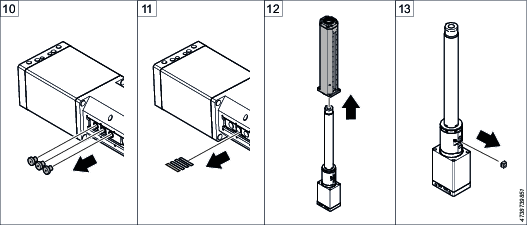
Place the press on a horizontal surface.
Disassemble all the cover screws.
Disassemble the cover.
Disassemble the guide rollers (3x).
Disassemble all leaf springs (up to 4x).
If less than 4 leaf springs, increase to 4 pcs at reassembly.
Disassemble the screw housing.
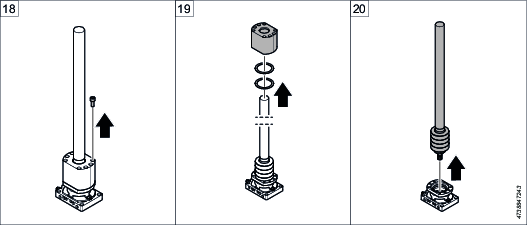
Disassemble the center roller holder.
Unscrew the screw nut and piston shaft assembly, by rotating the whole assembly of the inner shaft.
Disassemble the upper disc spring (and support washer).
Disassemble the outer bearing cover (towards the roller screw nut).
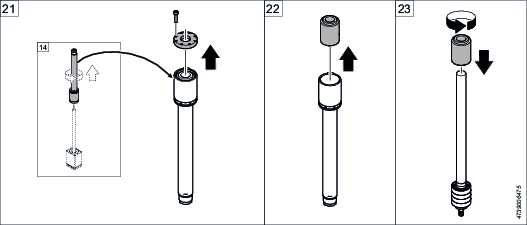
Clamp over load cell/housing in a vice using soft jaws.
Unscrew all bolts holding the load cell.
Disassemble the Inner bearing cover from roller screw shaft.
Disassemble the roller screw bearing disc spring and all washers.
Unscrew all the bolts and disassemble the upper flange.
Slide the roller screw nut out of the roller nut housing.
Make sure to remove the shaft key that connects the two parts to use at reassembly.
Screw the roller screw nut back onto the roller screw shaft.
Roller screw shaft and nut are a matched pair, each marked with a serial number.
Some of the steps are not needed at roller screw replacement.