Verification of Tool Accuracy
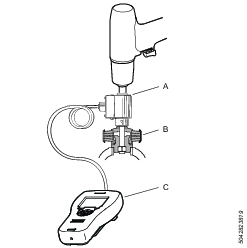
This test procedure is made in order to verify the tool accuracy. The test is made at three different torque levels with ten (10) tightenings performed at each torque level adding up to 30 tightenings in total. The result is compared with the reference transducer and if the deviation is within limits, the tool passes the test.
Test Conditions and Set Up

The following test conditions need to be fulfilled:
● Use an IRTT as reference transducer.
● Use a test joint with a real screw that gives increased clamp force when tightened, i.e. do not use a brake or similar. The joint should be soft (~100o, the total number of pulses should be >20 during the tightening).
● Do not use any extensions, only the IRTT and socket.
● The STa6000 filter frequency need to be set to 850Hz.
● Tool torque adjustment factor need to be set to 100%.
● The tool needs to be tested at 3 different torque levels, with 10 cycles per level, see table Tool Settings Per Tightening Sequence.
POWER FOCUS 6000 Settings
Stage | Parameter | Setting |
|---|---|---|
1. Start stage | Soft start | OFF |
Re hit detection | OFF | |
2. Rundown stage | Rundown speed | See table1 |
Rundown time limits | OFF | |
Rundown pulse limits | OFF | |
Rundown complete | 5 Nm | |
3. Tightening stage | Target torque | See table1 |
Pulse energy | See table1 | |
Residual torque correlation factor | 1 | |
Premature torque loss detection time | 200 ms | |
| Torque limits | Auto |
Angle limits | OFF | |
Time limits | OFF | |
Pulse limits | OFF |
1 Table: Tool Settings per Tightening Sequence
Tool Settings per Tightening Sequence
Tool model | Sequence | Number of tighetnings | Rundown (rpm) | Pulse energy (%) | Target torque (Nm) |
|---|---|---|---|---|---|
ETP TBP/TBP-S 6 | 1 | 10 | 1500 | 50 | 12 |
2 | 10 | 2000 | 80 | 22 | |
3 | 10 | 3000 | 100 | 32 | |
ETP TBP/TBP-S 8 | 1 | 10 | 1500 | 40 | 20 |
2 | 10 | 2000 | 75 | 37 | |
3 | 10 | 3000 | 100 | 55 | |
ETP TBP/TBP-S 9 | 1 | 10 | 1500 | 50 | 35 |
2 | 10 | 2000 | 85 | 55 | |
3 | 10 | 3000 | 100 | 70 | |
ETP TBP/TBP-S 13 | 1 | 10 | 1600 | 60 | 50 |
2 | 10 | 1900 | 80 | 100 | |
3 | 10 | 2200 | 100 | 150 |
Calculations
Use the results from the tightening, TBP and STa6000 values, to perform the following calculations and evaluations:
1. Calculate mean values
● Calculate the mean torque value (TBP mean) of all results displayed on the POWER FOCUS 6000
● Calculate the mean torque value (STa6000 mean) of all results registered by the STa6000.
2. Calculate the deviation in torque measurement between the TBP tool and STa6000:
Torque measurement factor deviation = 100x [TBPmean-STa6000 mean]÷STa6000 mean
Result for pass is ± 2.0%
3. Normalize the result from the TBP to achieve the same mean value as for the STa6000:
TBP normalized (1…30) = TBP value (1…30) x STa6000 mean÷TBP mean
4. Calculate the deviation between the STa6000 and the POWER FOCUS 6000 for each tightening:
Deviation (1...30) = TBP normalized (1...30) - STa6000 value (1...30)
5. Calculate the standard deviation (Sigma) for the 30 deviations calculated:

6. Check of torque measurement accuracy in relation to the tool maximum torque (ToolMax), specified per tool model, e.g. 55 Nm for TBP8.
Torque measurement accuracy = 100 x 3 x StdDev)÷ToolMax
Result for pass is: maximum 4.0%


