Connecting the tool and the FRL stand
-
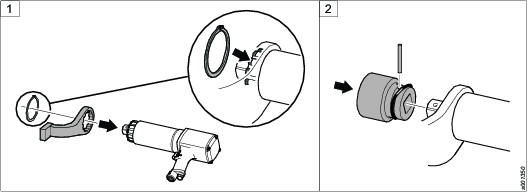
Attach the reaction bar to the tool and insert the retaining ring into the groove to hold the reaction bar in position.
-
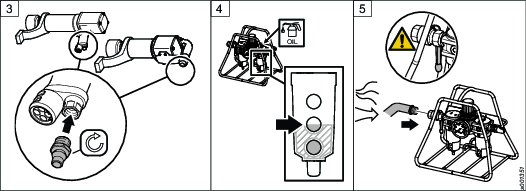
Attach the socket to the square drive. Insert the locking pin through the socket and square drive according to the illustration.
-
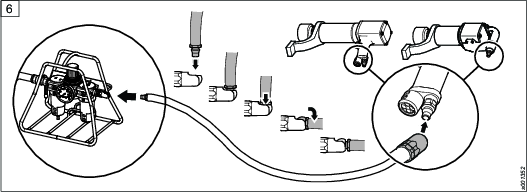
Attach the supplied Ergo nipple to the tool and tighten it to the correct torque.
-
Fill the optimizer with the provided oil up to the medium level. Refer to the optimizer instruction for details.
-
Before connecting the FRL unit to the main air supply:
Connect the main air supply hose to the FRL unit and tighten it correctly.
-
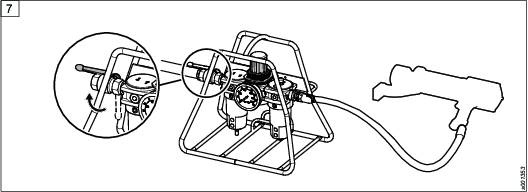
Connect the air hose supplied with the FRL unit. Insert the Ergo nipple into the Ergo quick coupling and turn it to a horizontal position according to illustration. Connect the other end of the hose to the tool.
-
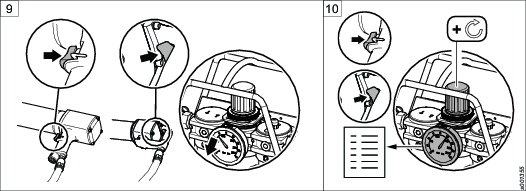
Open the air input and main shutoff valves of the FRL unit.
-
To adjust the air pressure on the FRL unit, unlock the control knob by pulling it up. Turn the control knob to adjust the air pressure according to the torque pressure chart.
-
Push the trigger button on the tool to vent any existing air in the system.
-
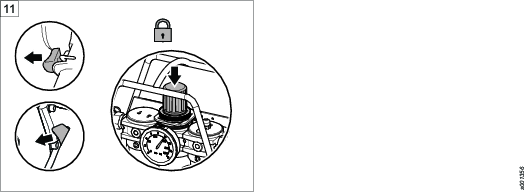
Continue pushing the trigger button on the tool. Adjust the pressure at free speed using the control knob, according to the torque pressure chart.
-
When you get the correct pressure, push down the control knob and release the trigger button.