Installing the ILS Target
Disassembly of the tool and/or installations of accessories must only be performed by qualified maintenance personnel.
Required tools:
Adjustable spanner
T10 screwdriver
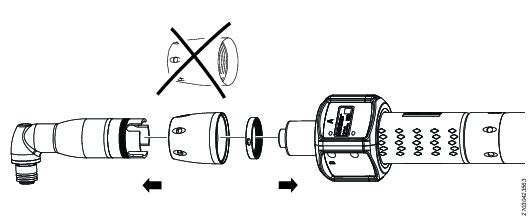
Remove the angle head.
Remove the circlip and the cap nut.
Remove the shaft and the plastic protection.

Screw on the cutting guide.

Cut the insulation. The flex cable is protected under a shield.

Mount the ILS Target on the tool. Start by fitting the lower half in the correct position.
When the lower half is in the correct position, the pin will fit into the slots of the motor housing, and prevent the ILS Target from rotating.

The pin on the inside of the target can be moved between the slots, allowing for two different positions of the ILS Target on the tool: 45° (A), or flat (B).
Put the upper half together with the lower half.
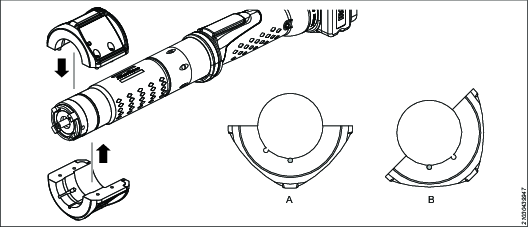
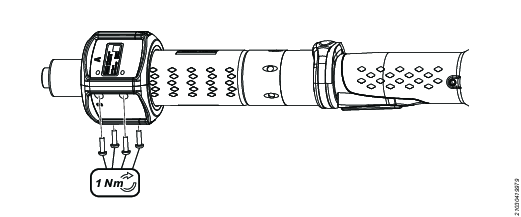
Tighten the four T10 screws.
Assemble the new shorter cap nut and the circlip on the angle head. Assemble the shaft and the angle head on the tool. Tighten the cap nut to specified torque.