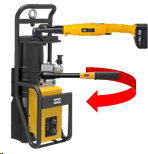
Batch Assembly Mode - Program 1
On the Tasks tab on the hand controller, select Batch assembly, then, select Program 1.
Scan the bar codes and accept it by pressing the forward button. There is an option for adding the bar codes manually by pressing the center button and selecting the manual input.
Enter batch count.
Select the bolt position number on the Position tool on bolt.
Start the program and follow the instructions at the bottom of the screen.
Installation phase
Press and hold the pressurize button on the hand controller until it stops building pressure.
Turn the nut clockwise.
Achieve torque by tightening the nut with the click wrench. When the torque is achieved all 3 LEDs will turn green. .
Release force on the click wrench.
Make sure the click wrench does not move in counterclockwise direction. When torque position is achieved, hold the click wrench for 0.3 seconds.
Pressurization phase
Press the pressurize button on the hand controller.
Rotate the click wrench gently.

When the pressure reaches the set pressure, rotate the click wrench while holding the pressurize button until all LED's are green.
Do not make any aggressive movements or over torque with the click wrench. This will damage the internal components and the sensors.
Pressure release
This manual pressure release is optional since it is also possible to configure an automatic pressure release.
Press the de-pressurize button.
If the hand controller shows OK, press the forward right button on the keypad to go to the next bolt.
If the hand controller shows NOK, go back by pressing the left button on the keypad, select Position tool on bolt, and start initialization phase again.
Try for five times, and if it is still NOK, change the bolt or check the conditions of the joint.
Repeating aggressive click wrench tightening to achieve required torque and angle will damage internal components of the tensioner permanently.
Check that the puller bar is completely closed before starting the next bolt cycle.


