Installation Instructions
Unpack the tensioner, hose and system cables from the respective boxes.
Check the pump oil level and power specifications. The required power to be connected is 400V, 50/60 Hz, 3 phase.

The system will not start if the oil level is below the minimum level mark. It triggers the Pump motor oil level low alarm.
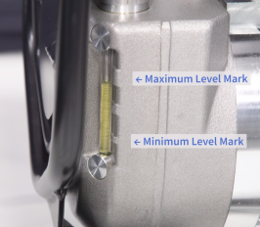
Top up oil and make sure that the in-use red cap is on the mouthpiece of the oil inlet. Do not use the pump with the black cap on as it can choke the system leading to no pressure built up.
SP2000, 400V is a 3 phase pump. When starting it the first time, no pressure is built if phases are reversed.
Connect one side of the hose to the pump and the other side to the tensioner. Secure the joint with locking rings.

Locking ring on hydraulic coupling Connect the system cables, use one system cable to connect the pump with the tensioner and the other to connect the pump with the hand controller.
Hand controller can be connected with system cables to the pump or to the tensioner.


Engage battery nutrunner on to the square drive at the top of the tensioner's head. The nutrunner is set at 30 Nm and an optimum speed for proper operation for all sizes of tensioners.

Check the battery charge level. The tensioner cannot rundown or be de-mounted after tensioning if the battery level is too low.
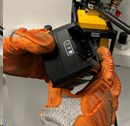
Do not remove the ring shaped holder from the frame. It supports the battery nutrunner.
Engage the click wrench on the tensioner. The click wrench is pre-set at 75 Nm from the warehouse. It should not be changed or set on site.
-
Before placing the tensioner on the top of the bolt, check the following:
The system is building pressure in manual mode at 200 bar.
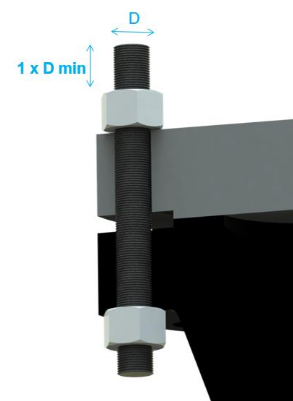
The bolt protrusion is as per guide plate provided in the kit. Minimum bolt protrusion must be equal to the 1 x D of the bolt. If bolt protrusion is below the minimum, the tensioner can cause serious personal injury.
Bolts are pre-tightened to a minimum required torque/load. For more information, contact Atlas Copco representatives.
Bolt threads and nut are lubricated.
Rundown the tensioner straight on top of the bolt while keeping clear from the wall. Make sure that the base of the tensioner touches flat the flange. Make sure it is not inclined or rocking on the top of the flange. Avoid uneven gaps as shown on the picture.
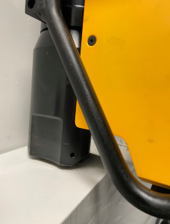
Take corrective actions to ensure smooth rundown every time, as misaligned flanges or inclined bolts can lead to load losses in joint.
Never use any other nutrunner or drive than the ones supplied with equipment.
Do not push hard to rotate the puller bar or the nut to achieve snug.
When the screen on the hand controller lights up and the Tasks menu is highlighted, the system is ready to use.
Check the status of connected device in the Connected Devices menu.
Check the number of tensioning cycles on the Puller Bar Count before maintenance or replacement. The maximum number of tensioning cycles is 5000.
Select the required program and follow the instructions at the bottom of the screen.


