Installing the drill
Required tools
-
Vise
-
Open-end spanners
-
Allen key
-
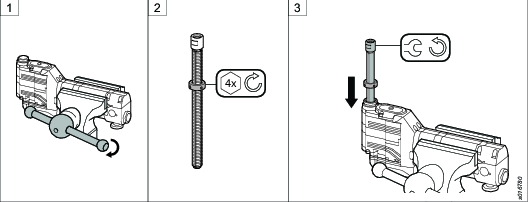
Fasten the drill in a vise with rubber pads, with the air logic unit downward and the drill handle to the right.
-
If applicable, install the starting position ring onto the spindle and move it into position. Tighten the starting position ring using an Allen key.
-
Install the spindle in the spindle socket from above. Turn the spindle counterclockwise to feed the spindle using an open-end spanner.
-
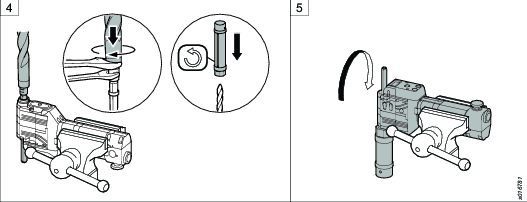
Put the drill bit in the spindle. Place open-end spanners on the spindle socket and the drill bit base to keep them from rotating. Tighten the connection. Put the front part over the drill bit. Turn the front part counterclockwise to secure it onto the connector.
-
Loosen the drill and turn it over. Fasten the drill in the vise.
-
Install the depth ring onto the spindle and move it into position. Tighten the depth ring using two open-end spanners.
-
Put the spindle guard over the spindle. Secure the spindle guard using an open-end spanner.
-
Attach a nipple for an air hose to the connector on the side of the motor valve. Connect the air hose to the nipple. Do a functional test of the emergency stop button:
-
Push the start button.
-
Push the emergency stop button so that it locks in position. The air supply to the motor switches off and the spindle stops.
-
Disconnect the air hose.
-
Pull the emergency stop button to reset it.
-