Lever Assembly Options
The lever can be turned from the top side to the underside of the tool.
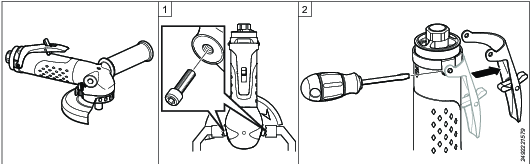
Remove the support handle and attach two screws in the holes of the angle head.
Hold the tool by the screws using a vice.
Remove the lever using a slotted screwdriver.
Remove the trigger pin with bushing using a 10 mm socket.
Remove the adapter using a 21 mm socket.
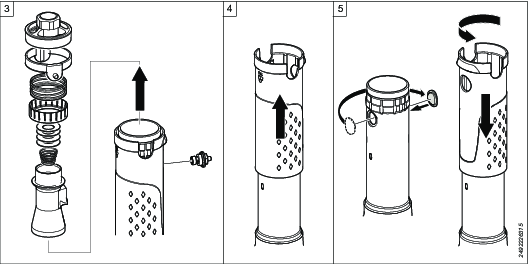
Remove the inlet/outlet parts.
Remove the insulation sleeve.
Move the cover to the opposite side of the casing
Put the insulation sleeve back in position and turn it to attach it to the casing.
Assemble the inlet/outlet parts.
Make sure the inlet is positioned correctly relative to the trigger pin bushing.
Apply Loctite to the bushing threads.
Attach the bushing loosely by hand.
Apply Loctite to the adapter threads.
Tighten the adapter using a 21 mm socket and torque wrench.
Tighten the trigger pin bushing using a 10 mm socket and a torque wrench.
Attach the lever in the opposite position.