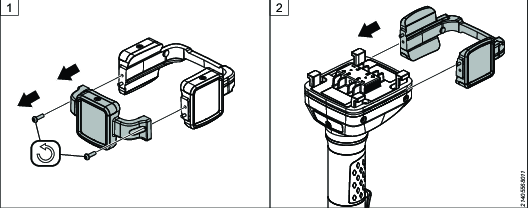
Installing the ILS Target
Remove the two T10 screws and separate the ILS Target into two parts.
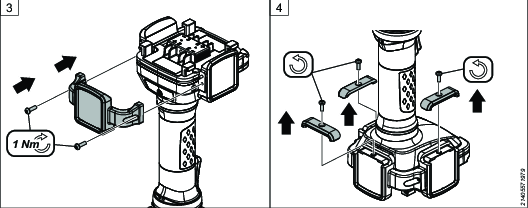
Slide the larger part of the ILS Target onto the foot of the tool. Make sure the ILS Target fits into the groove of the tool.
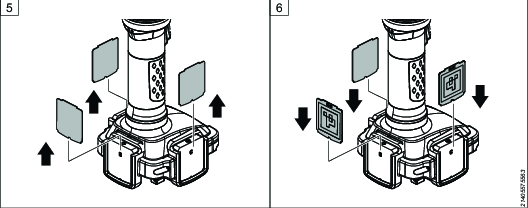
Put the two parts together and tighten the screws.
Loosen the three T10 screws and remove the three caps.
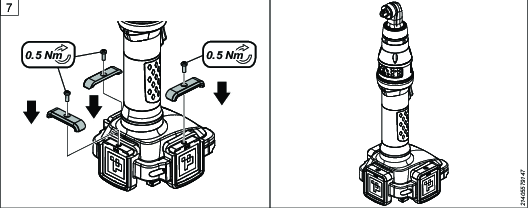
Remove the three cover tags.
Insert the ILS Matrix cards.

Make sure to insert the side with the clipped corners first.
Be careful not to scratch the surface of the ILS Matrix. It can affect the performance of the positioning.
Put the three caps back into place and tighten the three T10 screws.