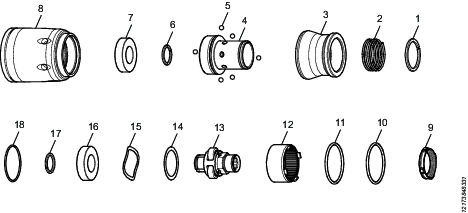
Assembling the Planetary Gear
Front Part Assembly
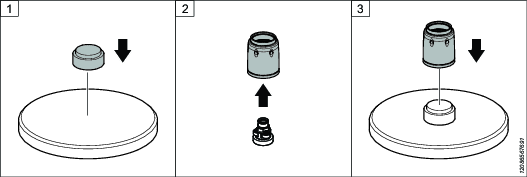
Insert the O-ring (18) into the motor housing.
Insert the 2 O-rings (10 and 11) into the front part (8).
Insert the plug (9) into the front part (8).
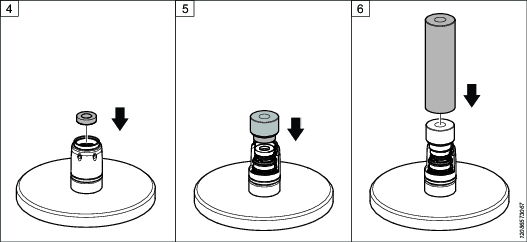
Insert the gear rim (12) onto the front part (8).
Assemble the washer (14) and wave washer (15) onto the shaft (13).
Press the ball bearing (16) onto the shaft (13).
Mount the snap ring (17) onto the shaft (13).
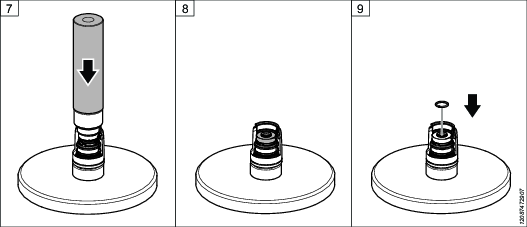
Insert the assembled shaft (13) into the front part (8).
Press the Ball Bearing Into the Front Part
Use the press tool 4080 1131 00 (1) and 4080 1132 00 (4), see image above.
See Front Part Assembly, for the numbers in the bracket.
Place the mounting tool on the press.
Insert the complete planetary gear into the front part. Make sure that when inserted the planetary gear springs.
Put the front part, facing upwards, on the mounting tool.
Insert the ball bearing (7) into the front part (8).
Place the second part of the mounting tool on the top of the front part.
Push down the press.
Press the front part and mounting tool together.
The surface of the front part will show some elevation.
Insert the snap ring (6).
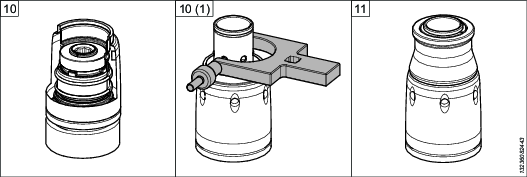
Assemble the connector (4) by following the order below.
Tighten the connector (4), to the front part (8). Tighten left threaded with 10 Nm, use tool 4080 8889 80.
Insert the 6 balls (5) in the holes of the connector (4).
Assemble the locking ring (3) over the connector (4)
Insert the spring (2) to the locking ring (3).
Assemble the snap ring (1).
Outcome of the complete connector.