Changing the speed
Required tools
-
Vise
-
Allen key
-
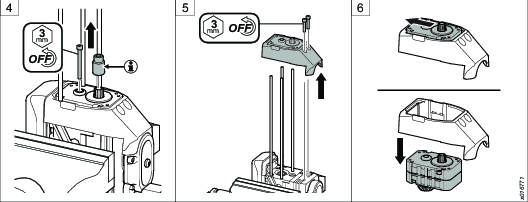
Fasten the drill in a vise with rubber pads, with the drill handle upward and the air logic unit to the left.
-
Remove the motor valve using an Allen key.
-
Pull up the motor housing and remove it.

Make sure that the motor does not fall out of the housing.
-
Loosen the gear wheel using an Allen key.
Only for a high-speed drill: Remove the spline connection.
-
Remove the cover with the split gear inside using an Allen key.
-
Gently push the split gear forward and remove it from the cover.
-
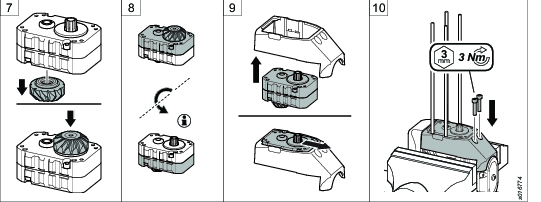
Change position of the bevel gear to the shaft on the opposite side of the split gear.
-
Turn the split gear in a suitable position.
The markings closest to the motor housing indicate the actual speed.
-
Put the split gear back into the cover.
-
Put the cover with the split gear back into original position and tighten the cover with screws using an Allen key.
-
Tighten the gear wheel with screw using an Allen key. If you cannot install the screw easily, turn the spindle to align the splines.
Only for a high-speed drill: Put the spline connection back into position.
-
Put the motor housing back into original position.
-
Put the motor valve back into original position and secure it with screws using an Allen key.


-
Push the start button.
-
Push the emergency stop button so that it locks in position. The air supply to the motor switches off and the spindle stops.
-
Disconnect the air hose.
-
Pull the emergency stop button to reset it.
-
Reconnect the air hose.


