Charging Airbac-S Tool
To apply the residual air pressure to the Airbac-S tools, Atlas Copco bolting solutions have developed two separate charging systems, mounted to the hydraulic pump unit. The first system comprises of a new hydraulic pump unit (based on the D500 / D600 pump units), with a unique charging valve.

The second system is for customers with standard D500 / D600 hydraulic pump units, where a separate module can be added / retro fitted Instructions on how to attach this separate module have been produced and included in the charging module documentation 8434243874 (HTT.19030.000A).
Whichever system is used to charge the Airbac-S tools (i.e. new standalone pump unit or retro fit module), the procedure is the same.
Before connecting the main air supply to the hydraulic pump unit, make sure the 3-way valve is in the closed position.

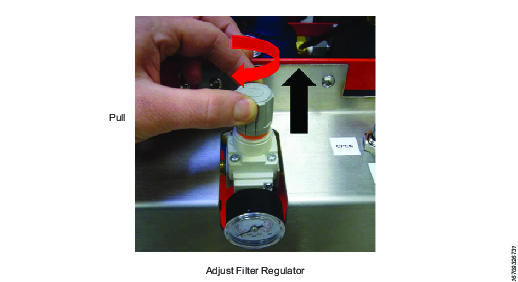
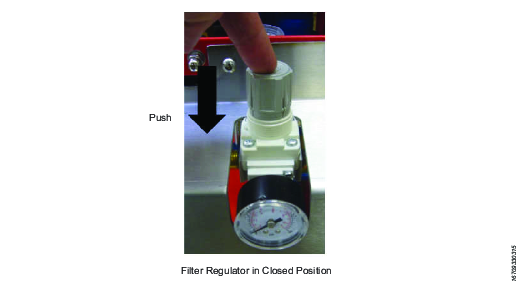
Connect the main air supply to the hydraulic pump unit. Regulate the Airbac-S charging pressure to 4.5 bar, by adjusting the small filter regulator. Make sure the adjustment cap is in the up position and rotate in a clockwise direction to increase the air pressure to 4.5 bar. To decrease the pressure, rotate in an anti-clockwise direction. When the target / required air charging pressure (i.e. 4.5 bar) has been reached, simply ‘push’ the adjustment cap down into the closed position.
Connect the selected air-gun assembly to the air charging hose. Ensure a strong connection is made by pulling slightly on the air-gun and air-line.

Connect the Air-Nipple into the air-coupling on the tensioner. Ensure a strong connection is made by pulling slightly on the air-nipple.

Connect the nipple end of the air-line onto the coupling on the hydraulic pump unit. Ensure a strong connection is made by pulling slightly on the air-line near the nipple.

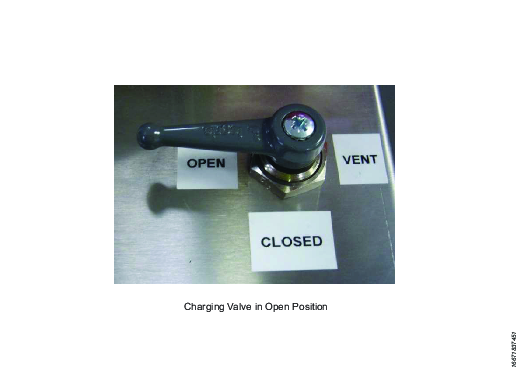
Open the air charging valve to the ‘Open’ position, this will allow the air to pass through to the air-gun assembly.
Press the button on the air-gun assembly, this will fill the Airbac-S compressed air chamber to the required 4.5 bar pressure.
When the air pressure in the Airbac-S tool has stabilized (leave for a minimum of 10 seconds), release the button on the Air-Gun assembly and move the handle on the air charging valve to the ‘Close’ position.

To remove the Air-Line from the Tensioner, turn the charging valve to the closed position and disconnect the Air-Nipple from the air-coupling by pulling back and holding the collar on the air-coupling. There will be a slight release of residual air. The operator will hear a venting sound.


The Airbac-S tool is fully charged.


