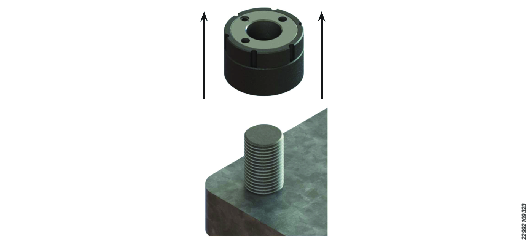
De-Tensioning Procedure
Choose the most accessible port and remove the blanking plug.
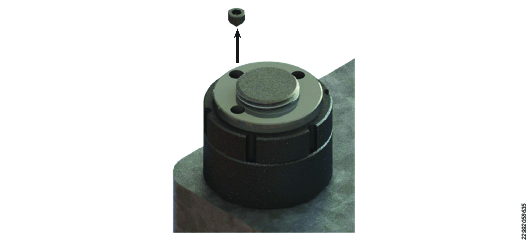
Replace the removed blanking plug with a male hydraulic fitting.

Hydraulic couplers of either type should be tightened into the tool from the adaptor piece only. Required tightening torque is 25Nm.

Do not overtighten the connection, it can damage the male sealing cone in the fitting.

Bolting calculations must be done by qualified engineers who are properly trained or have suitable experience in bolting technology.

If simultaneous tensioning of more than one bolt is to be carried out, fit one male and one female quick connect coupling to each hydraulic nut, and by using link hoses, link each nut together. The end nut on the application should have either an unconnected female coupling (to a link hose) or a blanking plug.

Connect the hydraulic nut to a suitable Atlas Copco pump unit by a length of link hose. A link hose is a length of high-pressure hydraulic hose with a male coupling at one end and a female coupling at the other.

Make sure that the pressure rating for the Atlas Copco link hose matches the maximum working pressure of the tool. Refer to the hard stamped details on the hydraulic nut.

The system must be at zero pressure before starting any investigation, maintenance or leak repair work.

During the de-tensioning procedure NEVER exceed the maximum working pressure of the hydraulic nut.
Definition: Break Loose Pressure (BLP) is the pressure at which the user can rotate the load retaining collar on the hydraulic nuts by hand with a tommy bar.

Once the pressure is holding steady, continue to slowly increase the pressure. Apply a light force to a tommy bar inserted into the collar. As soon as the collar rotates, BLP is reached. Once the BLP is found, stop the pump to hold the pressure and make a note of the pressure

Never exceed the maximum working pressure.
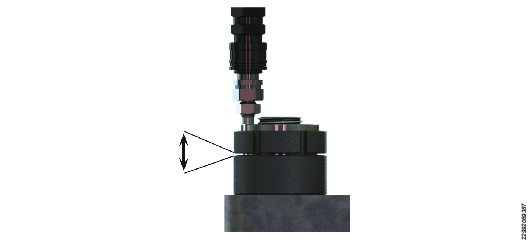
While holding the pressure, rotate the load retaining collar up, away from the hydraulic nut body.
Make sure that enough space is left below the collar for the piston to allow fully retract into the hydraulic nut body.

If locking collars are difficult to rotate at this BLP, slightly increase the pressure until the locking dollar become loose.

Never exceed the maximum working pressure of the hydraulic nuts.

Make sure that the bolt material and joint material can withstand the load you are applying.
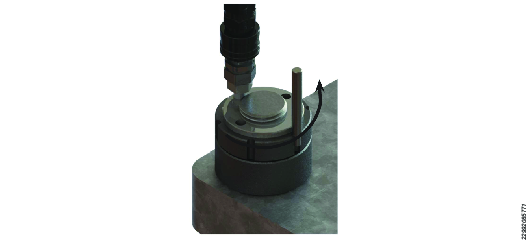
In the example shown in the picture below, the collar is backed off until it is level with the top of the piston. Therefore it allows the piston to fully return into the body without re-applying the load to the collar.


Never stand in line with the bolt axis while seating the collar. Unexpected bolt failure can result in serious personal injury or death.
Release the pressure from the pump. Remove the hydraulic link hose and hydraulic coupling from the hydraulic nut.

Only attempt to uncouple high pressure hydraulics while the system is not holding any pressure.

Never attempt to remove fittings from a high pressure hydraulic tool when the system is pressurized. Escaping high-pressure oil can penetrate the skin and is extremely dangerous. Seek urgent medical attention if oil penetrates skin.
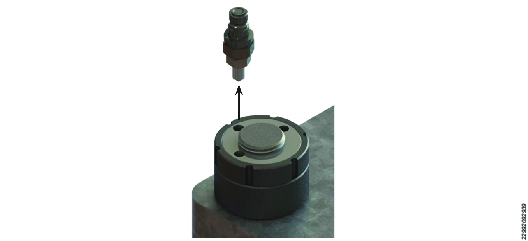
Replace the blanking plug in the hydraulic nut to prevent the ingress of contaminations into the hydraulic nut during storage and transport.

Disassemble the hydraulic nut from the bolt. If the hydraulic nut cannot be disassembled, the collar was not wound back enough and there is still load trapped in the joint. Repeat the de-tensioning process from step 1.
