Installation of the Aero WTB Tool
Check that the hexagon nuts at the tensioning end are free running on the studs; tighten the hexagon nuts down onto the joint face.
Lower the tensioner until the puller bar comes into contact with the stud.
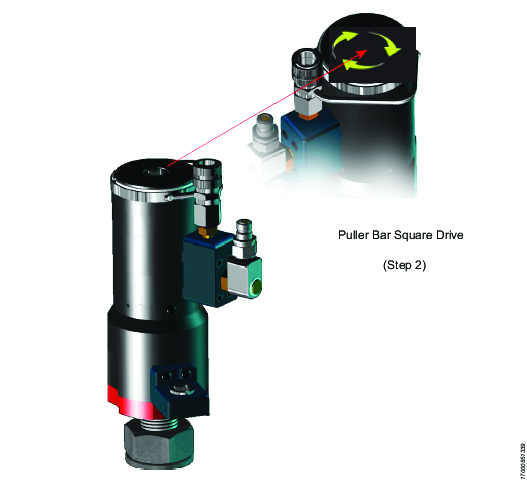
Rotate the puller bar until the puller threads engage with the stud threads. Use a suitable 1/2” square drive manual or pneumatic wrench (preferably set at a very low torque level) engaged into the female 1/2” square drive in the top face of the puller bar. Hold the manifold block steady while rotating the puller bar; keep the manifold block and hydraulic connections in an accessible position. Be aware that the tool outer body will want to rotate with the puller bar. Continue rotation until the base of the tool makes contact with the joint face.

If the tool fails to make contact with the joint face remove the tensioner and check that the stud protrusion is within tolerance. Please refer to the general arrangement drawing of the tensioner, which states the minimum and maximum stud protrusion required.
Once the tensioner is fully assembled on the joint, reposition the 1/2” square wrench to engage in the gearbox square drive and rotate the nut rotation shaft. The spring-loaded nut-rotating socket will snap down and engage correctly with the hexagon nut.

Failure to comply with this procedure will lead to a damaged and inoperable gearbox mechanism. The applied torque on the pinion drive must not exceed 30Nm
Repeat steps 1 to 4 until the bolts to be tensioned are all fitted with bolt tensioners.
Required Stud Protrusion


