Installing accessories

Disassemble of the tool and/or accessorie must only be performed by qualified maintenance personell.
This device emits CDRH/IEC Cl ass 2 laser and IEC Class 1M light. Do not stare into the beam.

Make sure the tool is disconnected from the cable before disassembling.
Required tools:
Adjustable spanner
Screwdriver
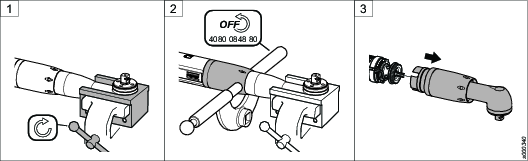
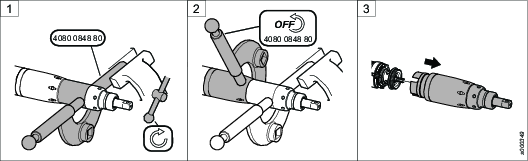
Put the front part in a clamping jaw (choose a suitable size) and fasten the clamping jaw in a vise.
Loosen the front cap nut using an adjustable spanner. Remove the tool from the vise.
Pull out the angle gear carefully from the tool.
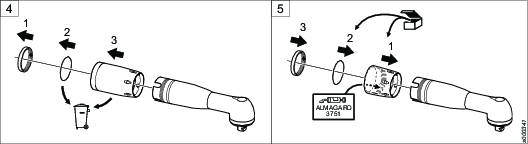
Remove the following parts from the angle gear housing:
the lock ring (keep for later use)
the sealing washer (to be discarded)
the front cap nut (to be discarded)
Mount the following parts on the angle gear housing:
new applicable front cap nut. Apply a thin layer of grease on the inside of the cap nut.
new sealing washer
lock ring
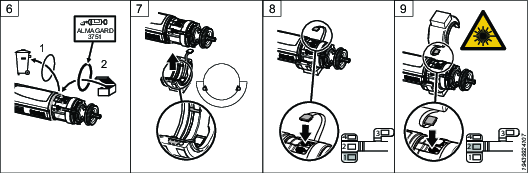
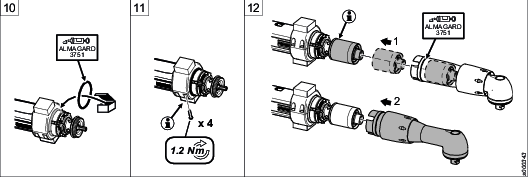
Replace the O-ring on the motor housing with an O-ring with the same diameter but thicker. Apply a thin layer of grease on the O-ring and on the lower section of the motor housing.
Place the tool into the half-ring with two pins on the inside. When the half-ring is placed in correct position, the pins will fit into the slots of the motor housing and prevent the half-ring from turning.
Connect the flex cable to the bus port marked 1.
Connect the flex cable on the upper half-ring to the bus port marked 2 and put together the two half-rings.
Place an O-ring in the slot at the front of the half-rings. Apply a thin layer of grease on the O-ring.
Tighten the two half-rings with 4 screws using a screwdriver.

Make sure the sealing on the end of the half-rings seals tightly.
Pull out the planetary gear from the gear housing. Push down the planetary gear fully on the shaft.
Make sure the gear wheel is placed in correct position.
Put the gear back in position. Apply a thin layer of grease on the sealing washer.
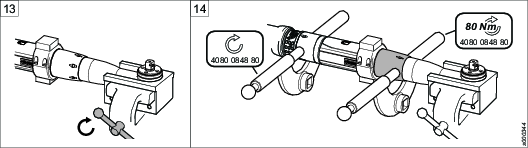
Put the front part in the clamping jaw and fasten the clamping jaw in the vise.
Tighten the front cap nut using adjustable spanners.