Installing the ILS Target
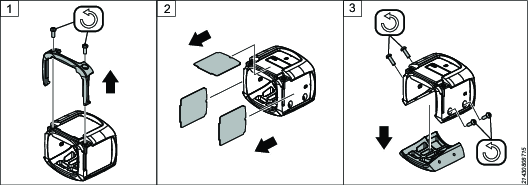
Remove the two T10 screws and the cap.
Remove the cover tags.
Remove the four T10 screws and so that one side of the target comes loose.
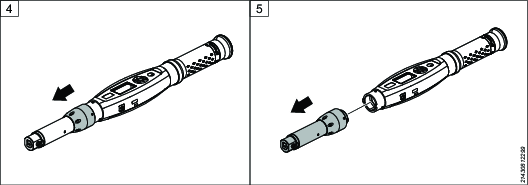
Loosen the cap nut from the ST Wrench.
Remove the tool head.
Mount the ILS Target on the tool.
Put backside of the ILS Target in place.
Tighten the four T10 screws.
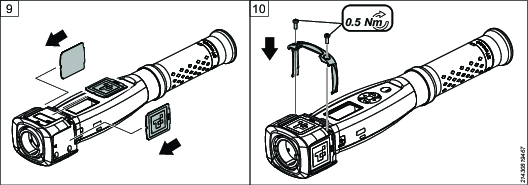
Insert the ILS Matrix cards.

Make sure to insert the side with the clipped corners first.
Be careful not to scratch the surface of the ILS Matrix. It can affect the performance of the positioning.
Put the cap back and tighten the two T10 screws.
Put the head back onto the tool and tighten the cap nut.