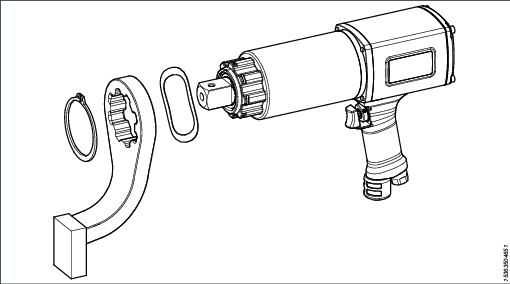
Reaction bar
Instruction Supplement
Installing the reaction bar
-
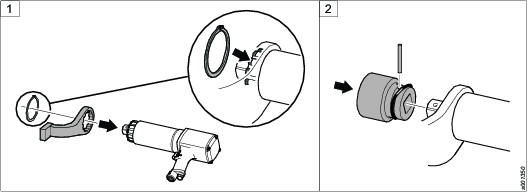
Attach the reaction bar to the tool and insert the retaining ring into the groove to hold the reaction bar in place.
-
Attach the socket to the square drive. Make sure to insert the locking pin through the socket and square drive according to the illustration.
Operating the tool with reaction bar
-
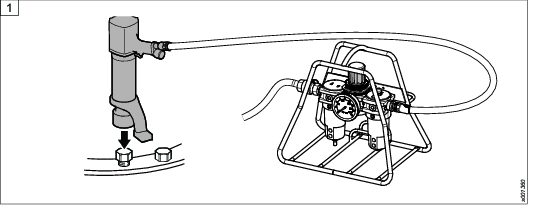
Attach the tool to the application.
-
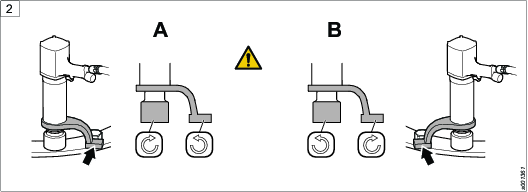
By using the reverse lever, the tool can be operated in both clockwise and counter-clockwise directions.
-
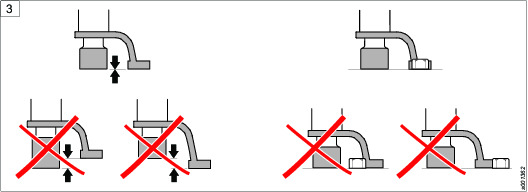
Make sure the tool is placed in the correct position on the work surface as described in the picture. The end surface of the reaction bar and the socket/nut must be aligned. Make sure that the foot of the reaction bar hits the center of the nut that takes the reaction force.
-
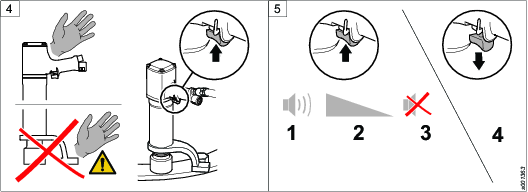
Press the push button to start the tool.
-
Continue pressing the push button while running down the nut. With pneumatic tools you can hear a sound, while the tool is running the nut down. When the sound decreases, release the push button to stop the tool. With electric tools the run down of the nut is controlled by the Power Focus.
Maintenance
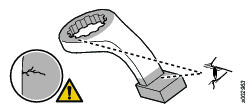
If the reaction bar is used daily, do a visual inspection every day of the sensitive areas, for example near the center hole and at the thinnest parts of the reaction bar.
When waved washer is included, make sure to assembly in correct order
